Test Run determines which test cases will be tested.
In a test run, you can either include all your project’s test cases or select a subset of them to be tested.
Configuring a test run
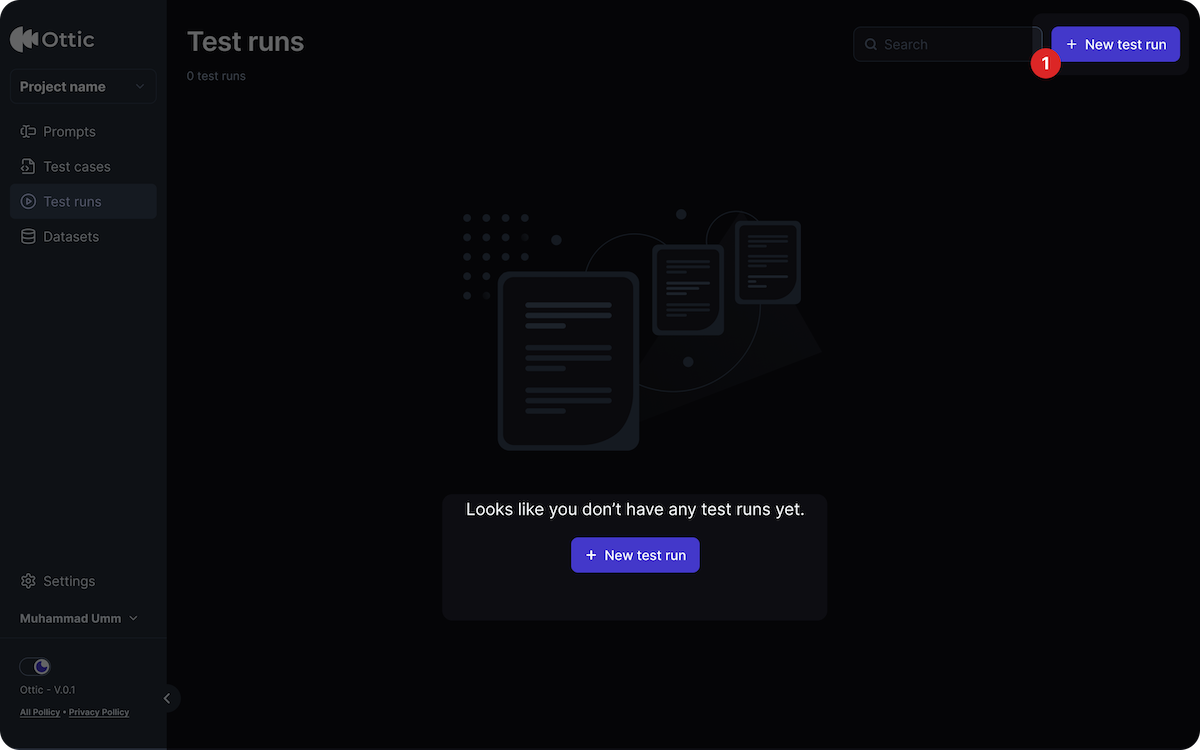
To create a test run menu:-
Click the ” New Test Run”;
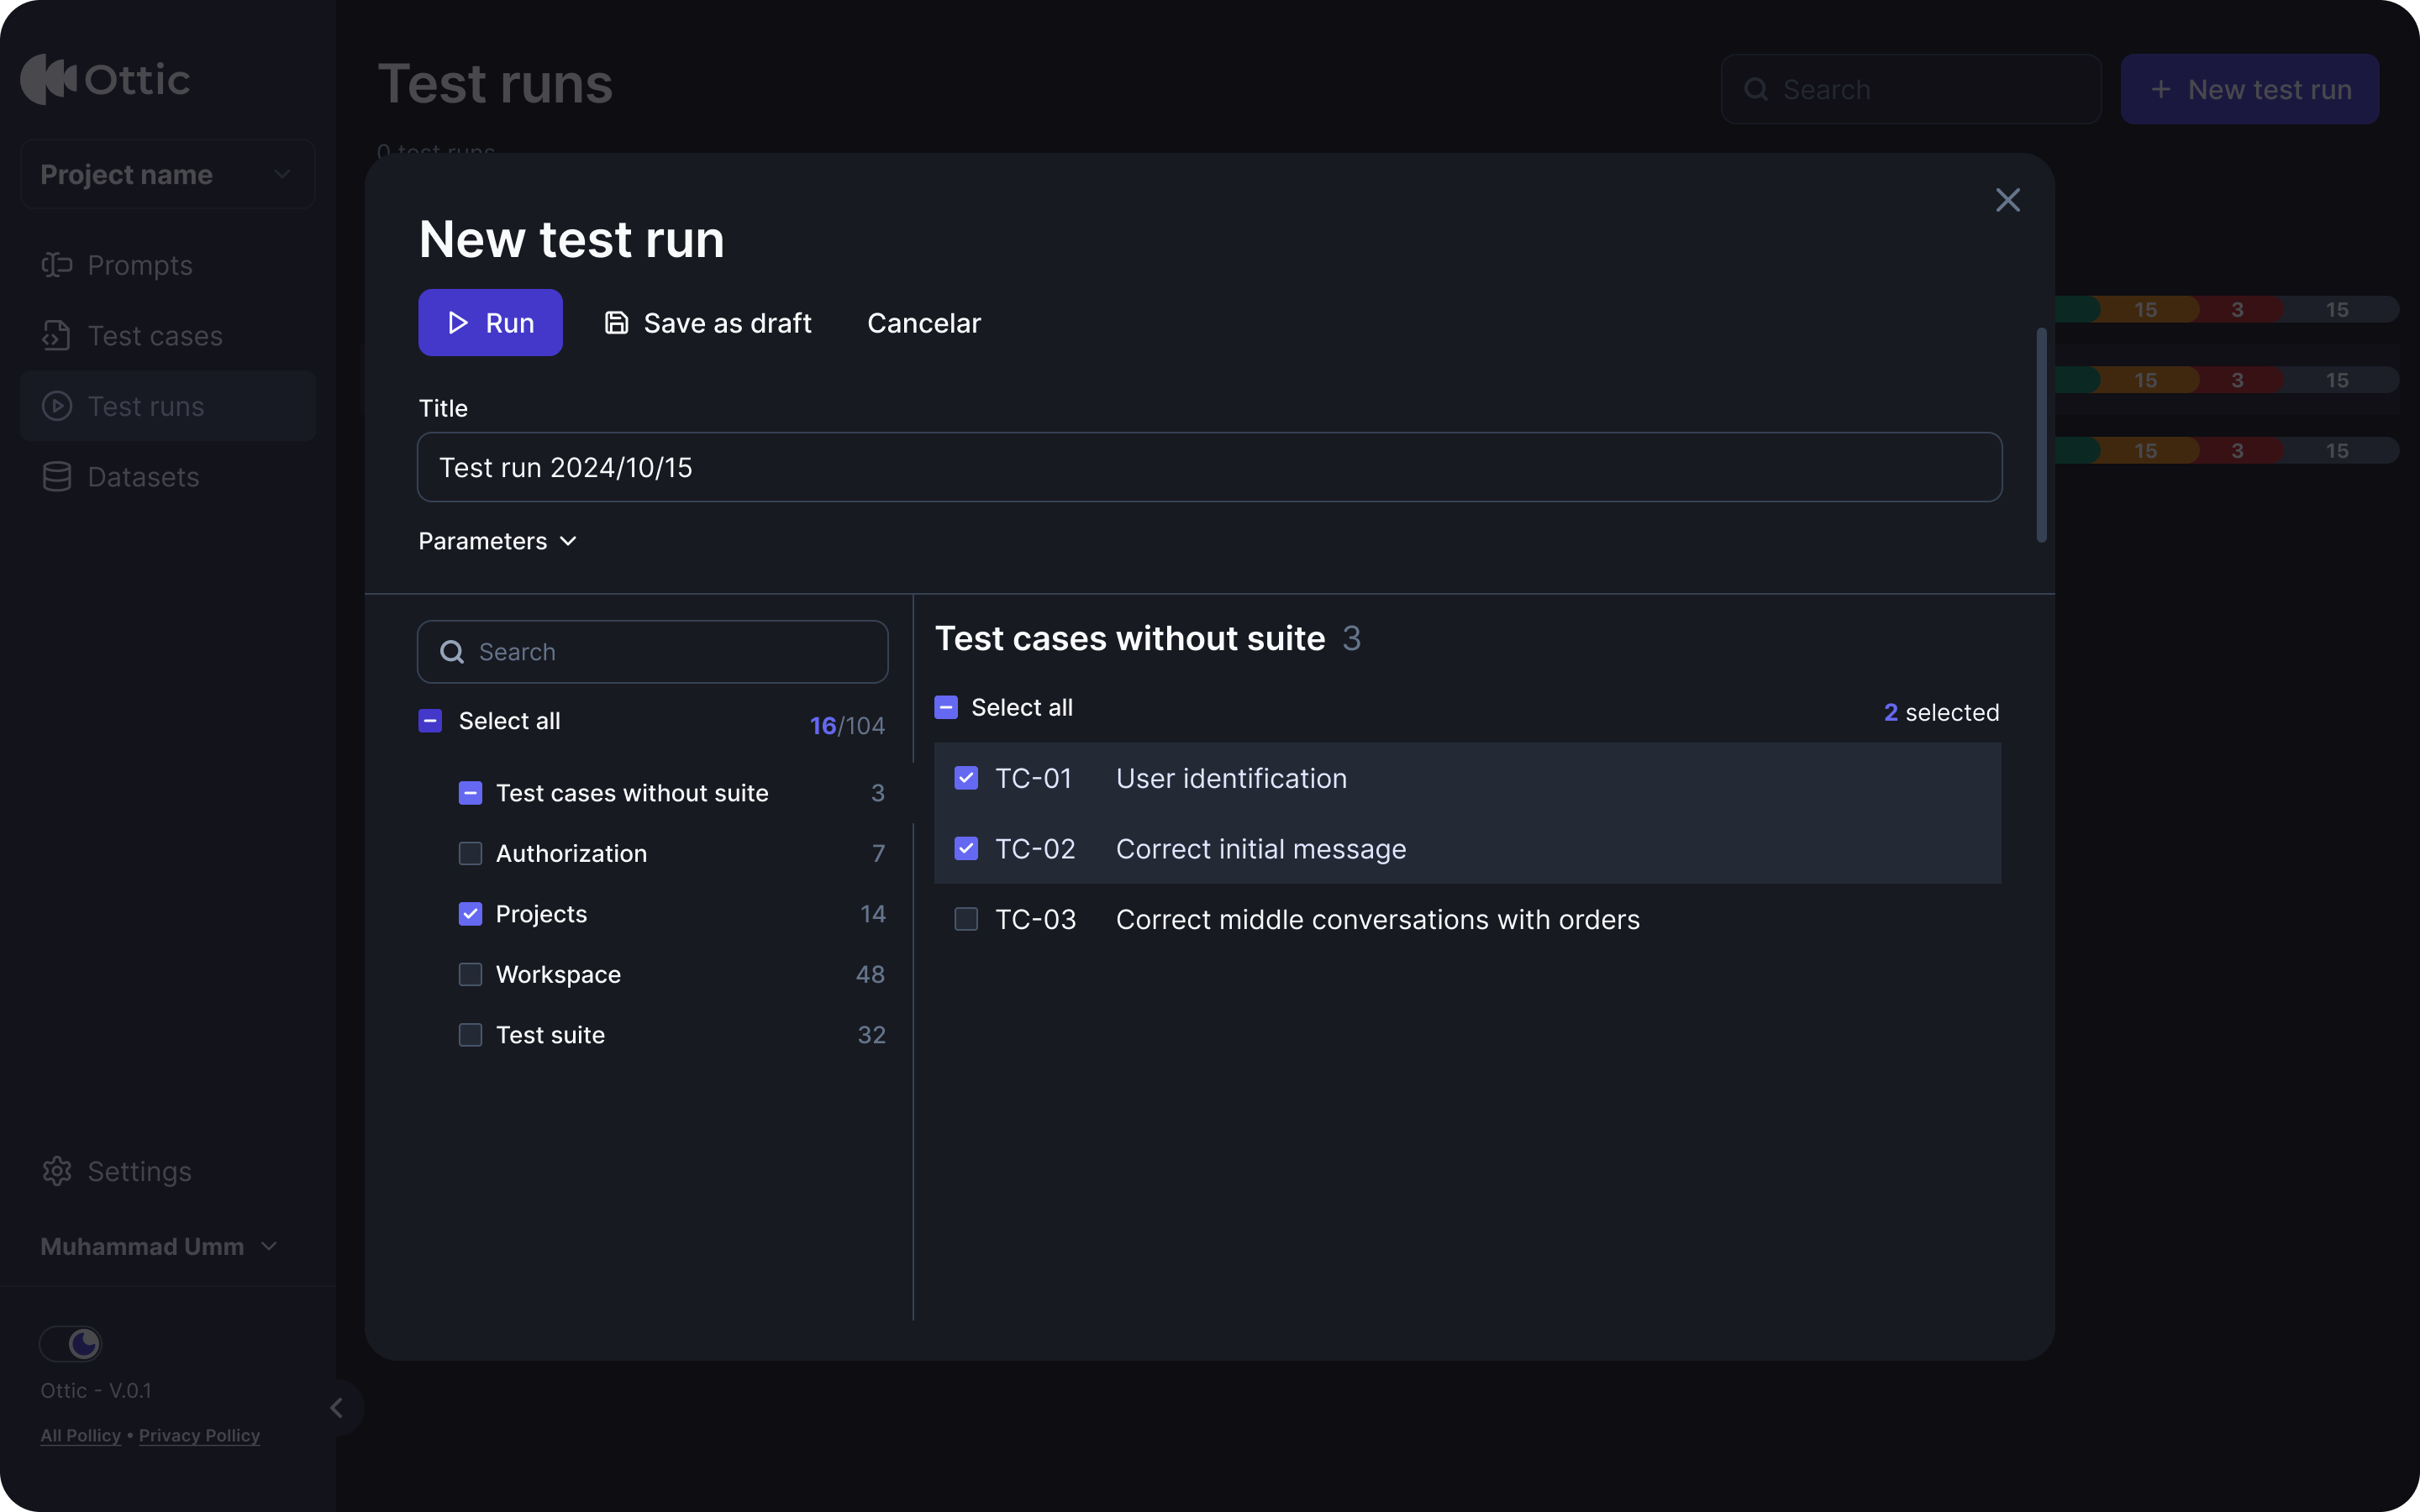
- Name the test run;
- Choose which test cases will be tested;
-
Click “Start test run” to execute the tests.
The test may take a few seconds to process before displaying the results.
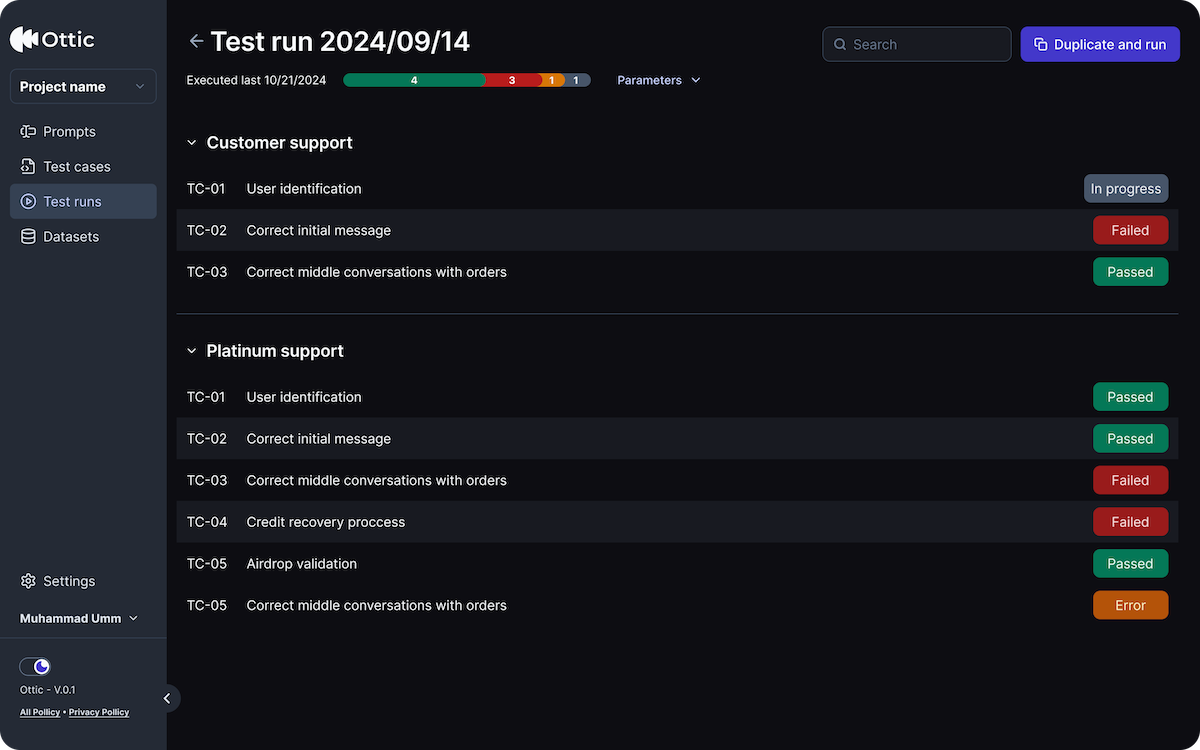
Viewing overall test results
On the Test Run List screen, you can monitor the following details for each test run:- Overal results of the test run;
- Breakdown of results (which test cases passed and failed);
- Date of execution.
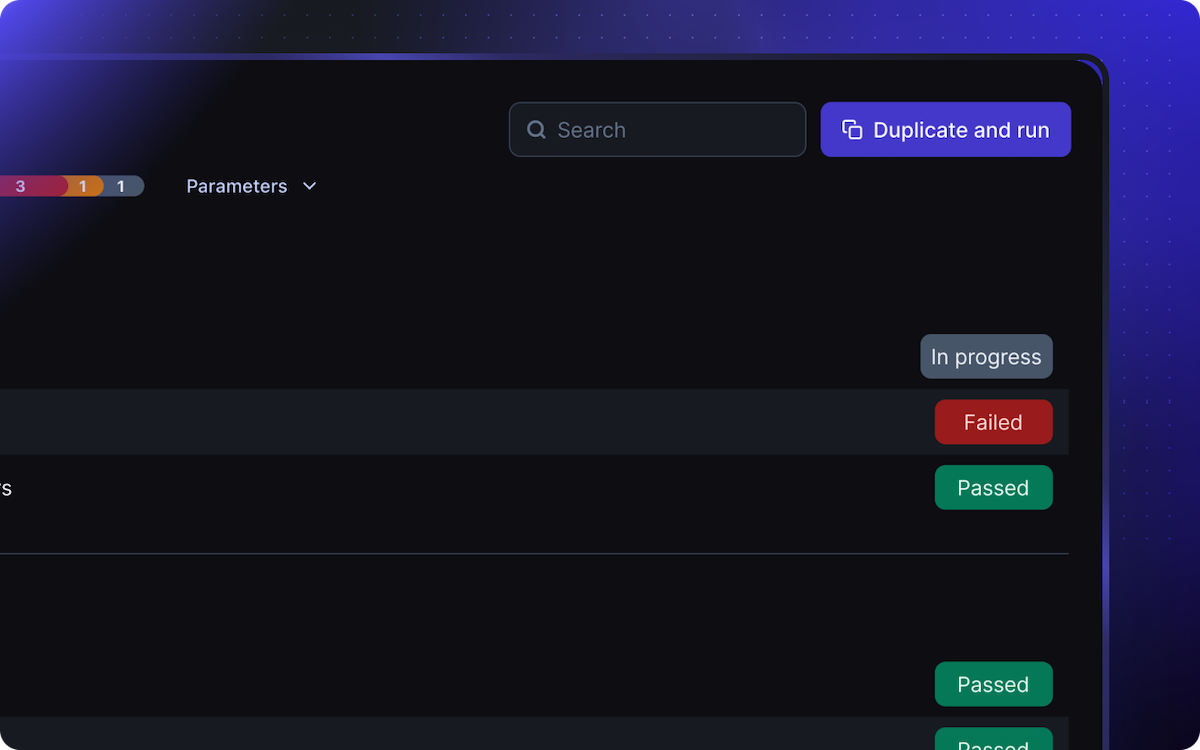
| Status | Description |
|---|---|
Passed | The test completed successfully. |
Failed | The test did not meet the expected results. |
Error | An error occurred, and the test was not processed. |
In progress | The test is currently running. |
The test may take a few seconds to process before displaying the results.
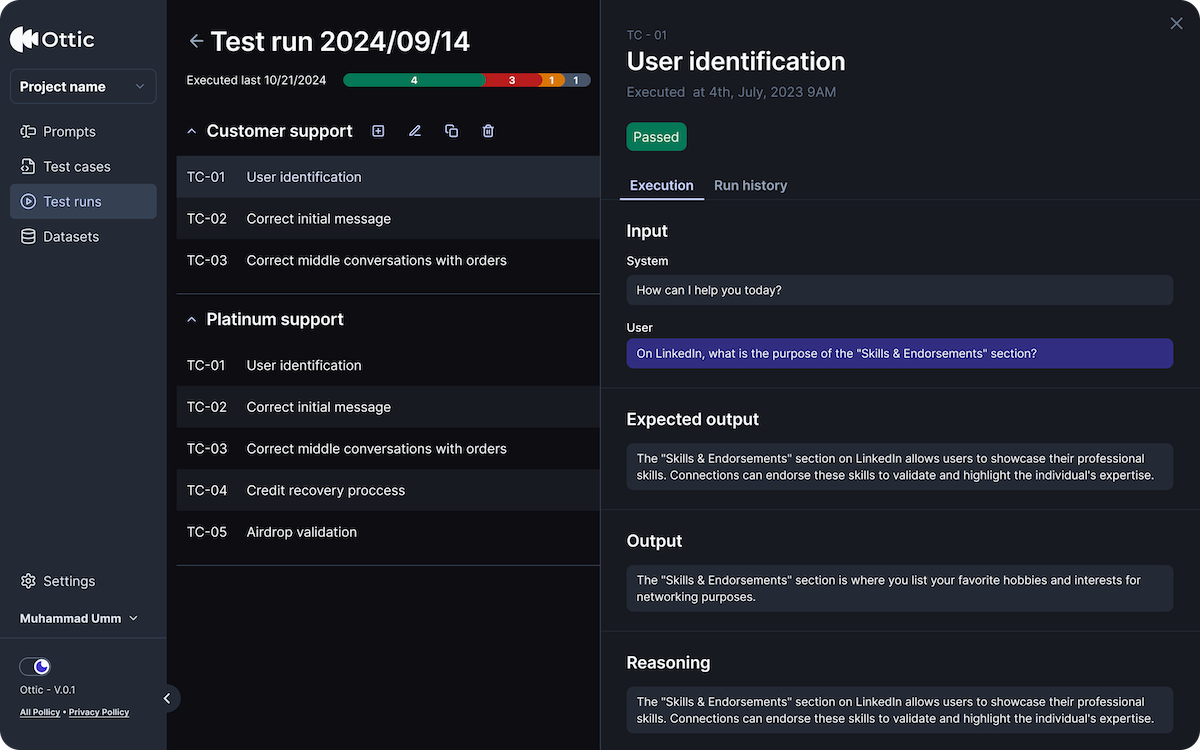
Exploring details of test results
Open an individual test case to view detailed information. In the Execution tab you´ll see:- Title and ID of the test case;
- Date and time of execution;
- Test status (passed, failed, error, in progress);
- Input or conversation tested;
- Expected output for the test case;
- Reasoning explaining why a test case failed.
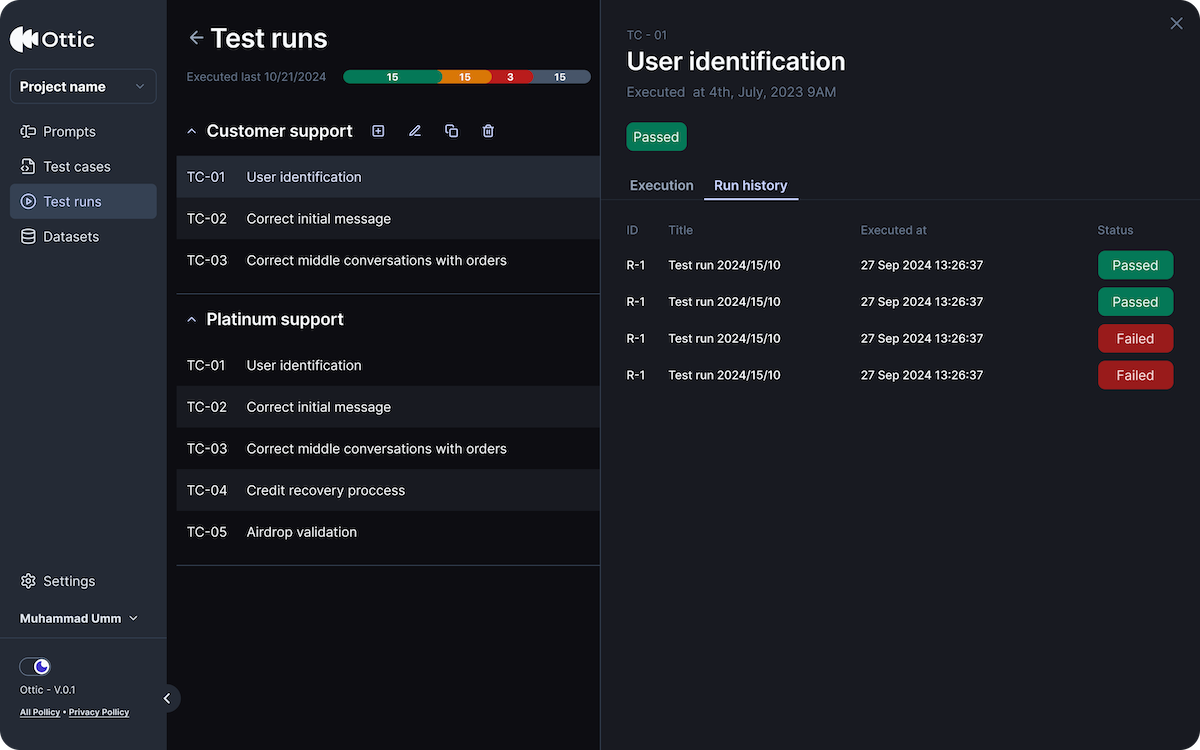
- When it was executed (Date and time);
- Test runs it is associated with (ID and title of the Run);
- Results history (passed of failed)
Duplicating and running a test
If you need to re-run the same test, simply click “Duplicate and Run.